25 Fun Easter Decorations DIY Kids Will Love to Make in 2025
Easter is just around the corner, and what better way to celebrate than creating handmade decorations with your little ones! As a mom in a blended family with five kids ranging from toddler to teen, I’ve discovered that DIY Easter crafts aren’t just about prettying up the house—they’re about bringing everyone together for memorable moments. Did you know that according to parenting experts, crafting activities strengthen family bonds while developing children’s fine motor skills and creativity? Whether you’re looking for simple projects for toddlers or more complex crafts for older kids, I’ve got you covered with these 25 adorable Easter decorations Diy kids will love to make!

You Do It All. And Nobody Even Notices.
You’re exhausted but you can’t explain why. This free kit finally gives you the answer.
Simple Easter Egg Decorations
Tissue paper decoupage eggs using colorful tissue and mod podge

Cut colorful tissue paper into small squares and have your kids brush a thin layer of Mod Podge onto plastic eggs before applying the tissue pieces. The overlapping layers create a beautiful stained-glass effect when the glue dries clear, especially if you use contrasting colors like purple, yellow, and pink. For added sparkle, sprinkle a bit of fine glitter between layers or add small craft gems as accents. These eggs can be displayed in a decorative bowl or hung from ribbons in a window to catch the light.
Cotton ball eggs for sensory fun with younger children

Start with cardboard egg cutouts and have your toddlers glue fluffy cotton balls onto them for a soft, textured decoration. You can dye the cotton balls beforehand using food coloring and water for pastel hues, or keep them white for a classic look. Add googly eyes and small felt pieces to transform them into bunny or chick characters with personality. These tactile creations are perfect for younger children who love sensory experiences and make adorable additions to Easter baskets or garlands.
Watercolor painted wooden eggs that become family keepsakes

Purchase unfinished wooden eggs from a craft store and let your kids paint them with watercolors for a beautiful, artistic effect. The wood grain shows through subtly, creating natural patterns that make each egg unique and special. After the paint dries, seal with a clear coat for longevity and consider adding small details with metallic paint pens. These wooden keepsakes can be brought out year after year and eventually become cherished family heirlooms that document your children's developing artistic abilities.
String-wrapped eggs using colorful yarn for older kids

For this craft, blow out real eggs (or use plastic ones) and cover them with glue before carefully wrapping colorful embroidery thread or thin yarn around them. The process requires patience and some dexterity, making it perfect for older kids who enjoy more detailed projects. Create patterns by changing yarn colors or weaving in beads occasionally for extra dimension and sparkle. Once dried, these intricate eggs can be displayed on small stands or nestled in a decorative nest for an eye-catching centerpiece.
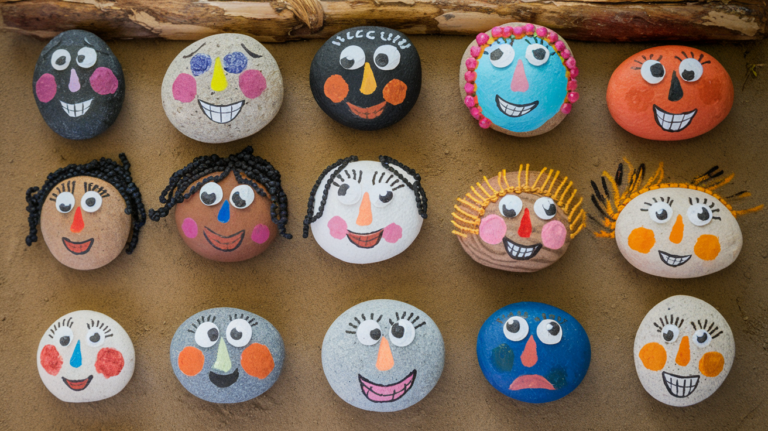
Thumbprint character eggs with faces and personalities

Hard-boil eggs or use paper egg cutouts as the base for this adorable craft where children press their thumbs into washable paint and create fingerprint characters. Transform the thumbprints into bunnies with drawn-on ears, chicks with tiny beaks, or flowers with stem additions using fine-tip markers. Each family member can create their own signature characters, making for a sweet collection that showcases everyone's creativity. These personalized eggs become conversation starters at your Easter gathering and can be photographed for lasting memories.
Easter Bunny Crafts That Double as Decorations
Toilet paper roll bunnies using recyclable materials

Save those cardboard tubes and transform them into a colony of standing bunnies by painting them white or pastel colors and adding construction paper ears, feet, and facial features. Cut a small slit in the bottom of each tube and insert a cardboard circle base so they stand upright on surfaces. Fill each bunny with Easter grass and small treats for an interactive decoration that doubles as a sweet surprise. These eco-friendly decorations teach kids about upcycling while creating adorable Easter decor for tabletops or mantels.
Paper plate bunny wreaths for door decorations

Cut out the center of a paper plate, leaving a ring that children can paint or cover with cotton balls for the bunny's fluffy white body. Add large construction paper ears at the top, googly eyes, a pom-pom nose, and whiskers made from pipe cleaners to complete the bunny face. Attach a ribbon loop at the top for hanging and perhaps a small cotton tail at the bottom for extra cuteness. This simple yet effective door decoration welcomes guests with Easter cheer and can be customized with each child's favorite colors or embellishments.
Cotton ball bunny garlands to string across windows

String together a series of bunny faces made from cardstock circles covered with glued-on cotton balls for a fluffy texture that kids love to touch. Add construction paper ears, drawn or stick-on facial features, and tiny pom-pom tails to complete each bunny character in the chain. Connect the bunnies with ribbon or twine, leaving enough space between each one to create an attractive display across windows, mantels, or banisters. This garland combines crafting skills like cutting, gluing, and stringing while creating a festive decoration that spans across your living space.
Sock bunny stuffies that can decorate shelves or beds

Repurpose old white or pastel-colored socks by filling them with rice or stuffing and tying off sections to create a bunny shape with a round body and head. Add ribbon bows around the neck, felt or button eyes, and long ears cut from felt or the sock's cuff folded in half. These soft decorative bunnies can sit on shelves, nestle in Easter baskets, or become favorite spring-themed toys that children made themselves. The project teaches basic sewing skills if you stitch on the features, or can remain no-sew using fabric glue for younger crafters.
Handprint bunny art to display on walls or refrigerators
Have your child press their hand onto white paper with the fingers spread to create the bunny's face and ears (the thumb and pinky become the ears, while the palm forms the face). Once dry, help them add details like eyes, whiskers, a pink nose, and inner ear coloring using markers or paint. Mount the finished handprint on colorful construction paper and frame it for a lasting Easter keepsake that doubles as seasonal decor. This craft creates a size record of your child's growth and becomes more precious with each passing year.
Spring-Themed Easter Baskets and Containers
Personalized paper Easter baskets with handles

Start with a template for a simple basket shape that children can trace onto colorful cardstock or construction paper before cutting out and assembling. The sides can be decorated with Easter stickers, drawings, or stamped patterns before the basket is folded and secured with staples or glue. Add a handle made from twisted paper strips or ribbon, and personalize each basket with the child's name using letter stickers or handwritten tags. These custom containers are perfect for small egg hunts or as gift baskets for classmates and friends.
Decorated mason jar containers for Easter treats

Transform regular mason jars into Easter-themed containers by wrapping the outside with pastel tissue paper secured with Mod Podge or decorating with acrylic paint in spring colors. Add bunny ears made from pipe cleaners around the rim, googly eyes and a pom-pom nose to the front, and a fluffy tail to the back using cotton balls or a pom-pom. Fill the jars with Easter grass and treats, or use them as vases for spring flowers that can brighten up any room. The glass jars provide durability while allowing children to see their colorful contents.
Shoebox Easter scenes with grass and figurines

Have your children transform an ordinary shoebox into a miniature Easter diorama by laying the box on its side and decorating the interior with a springtime background. Add real soil or crumbled brown paper for the ground, artificial or tissue paper grass, and populate the scene with handmade clay bunnies, chicks, or lambs that children can sculpt themselves. Small details like tiny egg shapes, paper flowers, and perhaps a miniature pond made from blue cellophane elevate the scene into a magical Easter world. This three-dimensional decoration encourages storytelling and imaginative play while serving as an impressive display piece.
Paper mache nest baskets using newspaper and glue
Guide your kids through creating realistic-looking bird's nest baskets by covering inflated balloons with layers of newspaper strips dipped in paper mache paste (a simple mixture of flour and water). Once dry, pop the balloon, cut an opening at the top, and paint the hardened shell with brown tones before adding a layer of mod podged raffia or shredded paper for texture. These nests can hold colorful eggs and become natural-looking decorations that teach children about birds' springtime activities. The project spans multiple days as layers dry, building anticipation and patience.
Fabric-wrapped containers for reusable Easter decor

Show older children how to wrap clean, empty cans or boxes with pastel fabric secured with fabric glue for a sophisticated Easter container. Add dimensional decorations like fabric flowers, ribbon bows, or embroidered details for personalization and visual interest. These durable containers can be reused year after year for holding Easter treats, spring blooms, or organizing small craft supplies. The fabric-covered vessels introduce basic textile crafting while creating practical decorations that transcend the typical paper-based children's projects.
Nature-Inspired Easter Decorations
Eggshell planters with fast-growing seeds (like grass or beans)

Save emptied eggshells (rinsed and dried) and help your children fill them with potting soil and quick-sprouting seeds like grass, beans, or herbs. Place the planted shells in an egg carton decorated with paint or paper, and within days, tiny green sprouts will emerge, creating living Easter decorations. Children love monitoring the daily growth and can add small signs with messages or decorate the shells with faces so the growing grass becomes "hair." These mini-planters teach children about plant life cycles while bringing the renewal symbolism of Easter to life through actual growing plants.
Bird's nest decorations using twigs and raffia

Help your kids collect small twigs, dried grass, and natural string during a nature walk, then guide them in weaving these materials into nest shapes approximately 4-5 inches across. Secure the structures with hidden wire or natural twine, then add small speckled craft eggs, tiny feathers, or even a miniature bird figure to complete the realistic scene. These natural decorations connect children to the outdoors while creating rustic, beautiful pieces that can adorn mantels, tables, or bookshelves. The gathering of materials becomes an educational scavenger hunt that extends the craft experience beyond just assembly.
Spring flower crowns using paper flowers or real blooms

Show your children how to create a base from twisted paper or cardboard strips sized to fit their heads, then attach tissue paper flowers in various springtime colors like yellow, pink, and lavender. For each flower, stack several layers of tissue squares, pinch the center, secure with a pipe cleaner, and fluff the layers to create dimensional blooms. These wearable decorations transform children into spring fairies or garden royalty while bringing color and joy to Easter gatherings. Photographs of children wearing their handmade crowns make beautiful seasonal keepsakes.
Butterfly suncatchers for windows using tissue paper

Guide your kids to cut butterfly shapes from black construction paper, then help them cut out the inner sections, leaving a frame that resembles a butterfly silhouette. Attach pieces of colorful tissue paper behind the openings using glue, creating a stained-glass effect when hung in a sunny window. Add details like glitter for sparkly bodies or antenna made from pipe cleaners for dimensional interest. These bright decorations cast colorful shadows throughout the room and symbolize transformation and new beginnings associated with spring and Easter.
Branch Easter trees decorated with homemade ornaments

Take your children on a hunt for the perfect branch with multiple offshoots, then stabilize it in a vase filled with stones or sand and help them paint it white or leave it natural for a rustic look. Create tiny ornaments from salt dough, small paper shapes, or miniature decorated egg ornaments that can hang from the branches using thin ribbon or string. This Scandinavian-inspired decoration becomes more beautiful as children add ornaments throughout the season and serves as a growth activity that evolves over time. The completed tree makes a stunning centerpiece or entryway decoration that showcases your children's handmade treasures.
Easter Table and Home Decorations
Kid-made Easter place cards with pop-up elements

Have children cut egg shapes from cardstock, fold them slightly in the middle so they stand up, and decorate each one with a different spring design using markers, stickers, or watercolors. Help them write each family member's name in their best handwriting or with letter stickers for a personal touch. For extra fun, create a small pop-up element like a chick or flower that springs up when the card is opened. These personalized creations make the Easter table feel special and give children pride in contributing to the family celebration in a meaningful way.
Bunny napkin rings using cardboard tubes and paper

Guide your children in transforming toilet paper tubes into cute napkin holders by cutting them into 1-inch rings, then adding bunny ears, faces, and cotton tails using construction paper and pom-poms. Paint the cardboard rings in pastel colors or cover them with decorative paper for a finished look that coordinates with your Easter table setting. Each child can create their own signature bunny character with unique expressions or colors, making setting the table a fun part of the holiday preparation. These functional decorations combine crafting with practical table-setting skills and can become part of your annual Easter traditions.
Decorated Easter candle holders from recycled jars

Help your kids transform clean glass jars into beautiful luminaries by adhering tissue paper cutouts of Easter shapes (eggs, bunnies, flowers) to the outside using a water-diluted glue mixture. Place battery-operated tea lights inside for a safe glow that illuminates the colorful designs when lit. The translucent effect creates a magical ambiance at the Easter dinner table or as evening decorations around the home. This craft introduces children to working with transparency and light while creating a sophisticated decoration that adults will appreciate too.
Egg carton flower centerpieces painted in spring colors

Show your children how to cut apart egg carton cups and transform them into flowers by cutting petal shapes around the edges and painting them in vibrant spring colors. Attach the finished blooms to green pipe cleaner stems using a hot glue gun (with adult supervision) and arrange them in a painted mason jar or small vase filled with decorative stones. These upcycled flowers make charming, eco-friendly centerpieces that last much longer than real flowers and demonstrate creative repurposing. Children can customize their flowers with different petal shapes, colors, and embellishments like glitter or tiny rhinestones in the centers.
Bunting and paper chains in Easter colors for quick room transformations

Set up a production line where kids can cut pastel paper into strips for paper chains or triangle shapes for bunting that will decorate your living spaces for Easter. The paper chain links can be interlocked and secured with glue or staples, while bunting triangles can be attached to ribbon or string with tape or staples. These simple decorations have big visual impact when strung across windows, doorways, or along staircase railings. The repetitive nature of these crafts makes them perfect for group projects where even young children can contribute while developing fine motor skills and pattern recognition.
Conclusion
Creating these Easter decorations with your kids isn't just about making your home look festive—it's about building traditions and memories that will last much longer than the decorations themselves! I've found that even my teenagers enjoy getting involved when the projects are engaging enough. Set aside a weekend afternoon, gather your supplies, and let the creative fun begin. Don't worry about perfection—the slightly wobbly bunny ears and imperfectly painted eggs are what make these decorations special and uniquely yours. Which project will you try first with your little ones? Whatever you choose, I guarantee the giggles and proud faces will be worth every bit of glitter you'll be finding around the house for weeks to come!